Wednesday, August 31

The Colorful Countertop

Looking to add a little color to your kitchen or bath?  Why stick to the same old browns and beige's?  There is color brewing from many of the top countertop surface providers, and now is the time to make a statement.  Many of the surfaces featured are also great for any LEED projects, so not only are they beautiful, they are also environmentally friendly and sustainable materials.    

The Corian Illumination Series features several colors and patterns in soft pastel colors that look great with back lighting.  These tops would be a great addition to any vanity or island as an accent.  They have also been featured in several commercial applications including bars, restaurants, and hospitals.    Like any other Corian color, this collection features a seamless appearance.  Like many other surfaces, Dupont Corian has several products that are environmentally friendly.    
The Silestone Life Series by Cosentino features colors like Fun (Pictured Above) as well as Enjoy (Blue), Vital (Red), Cool (Orange) and Dream (Yellow).  These colors do bring the "Life" to your space with vibrant colors and little maintenance.   Silestone is also an environmentally friendly counter surface.  
ThinkGlass by Mailhot creates custom Glass countertops with a mixture of custom colors to create a focal point in the kitchen, and a statement.  Each countertop is custom, and allows the designer or home owner to design a custom look for each installation.  This product is also 100% recycled materials and goes toward LEED points.  
Onyx counter surfaces come in an array of colors and patterns typically of earth tones, however some do feature greens purples and blues.  These tops can also be lit from below to create an accent piece, focal point, as well as accent lighting.    

Friday, August 26

The Steps to Remodeling

When your thinking about a remodel, there are a lot of things to think about.  The first question that comes to mind is always the same, and always the hardest one most home owners have answering: 

"Where do we start?"

Here is a step by step outline of where to start, and where to finish, and what steps to take in the middle.  It is very important that you follow these steps so you don't have to redo certain aspects, or get yourself stuck with something you didn't really want.  

A General Rule of Thumb:  Start from the Top Down!  

Step 1: Starting from the top down, naturally, you should start with the ceiling.  This includes removing that old nasty "Popcorn" ceiling, that 80's honey oak light box, removing the soffit, etc.  All of these elements should be done first.  You don't want to install your flooring, then mess it up trying to demo a dropped ceiling.  It is important to have a lighting plan in place, which can always be implemented later, but at least start planning for it.  

Step 2: The Walls, which are the bones and skeleton of the room.  You don't want to purchase cabinets and then later realize you want to knock down that wall and turn the peninsula into an island.    Be sure to include any new doors and windows.   Remember to paint the walls, because you don't want to get paint on the cabinets or tile trying to add it later.  

Step 3: The Cabinets are done once the walls are in place and where you want them.  Its very important to give yourself a little wiggle room, if ordering the cabinets before the walls are in place, because often the walls don't end up exactly where they are planned.  Even if it is a fraction of an inch, it still needs to be planned for. If your doing a bedroom or living room, this is where you start thinking about your space planning, and purchasing any new furniture.  

Step 4: Lighting.  Now, I know that lighting should have been done along side of the ceiling, which is why it was important to get a plan. You don't want to hang pendant lights over the island, and then the island end up being off center a bit.  So its good to run the wiring for the electrical in step one, as well as any recessed can's, and then hang pendant lights, under cabinet lights, and accent lighting after the cabinets are installed.  

Step 5: Countertop is always, always, ALWAYS done after the cabinets.  Like I said in one of my previous blog posts about Renewing and Refacing, if you get your top first, your stuck with your cabinets.  I have had to tell to many D-I-Yers that hate their cabinet layout that they are stuck with it unless they want to redo their tops....again.  Who wants to go through that again, much less pay for it?  This step is where you will also pick out your new kitchen sink, faucet, garbage disposal, and any other accessories to be attached to the countertop.  Also, consider your back splash.  

Step 6: Now, we are to the ground, the flooring.  Again, you don't want to install new hardwood flooring around your existing kitchen layout when you are planning on changing that down the road.  It is often costly to pay someone to come back in and try to seamlessly patch the flooring after that peninsula is ripped out and an island put in.  Always have a general idea or the flooring selected so care can be taken when installing the cabinets.  

Now, be sure to have a plan before you start the remodel.  You don't want to do a little at a time by the seat of your pants.  This is where errors and redo's happen, and when on a tight budget, you can't afford those.  Especially if you are starting out with your first home, or doing a little remodeling at a time, its perfectly acceptable to do each part of the remodel as you can afford it.  (Or, as you have the three day weekend to tackle the project on your own).  Be sure to consult a designer to come up with a plan, and be prepared, so when you are on step one, you have the finished project in mind, and the plan to follow.  

Friday, August 19

The Updated Shaker

I love a good old shaker door. The clean lines offer minimal detail that can then be accented by creative and fun hardware, and the door style is typically very easy to clean.  That being said, I find myself falling in love with a new style of cabinet door styles I am calling the "Updated Shaker".

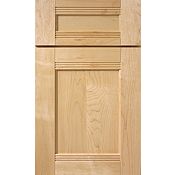
Similar to a traditional shaker, these door styles have minimal frame detailing, however an extra little moulding along the edge of the center panel. Often, these doors are less expensive than some wider railed shaker options, and lend themselves to more of a transitional kitchen. 

The Thomasville Cabinetry Saxony Doorstyle shows a traditional shaker enriched with a triple bead molding detail on the horizontal interior edges of the center panel.  Shown on both the drawer and door.  
This Kraftmaid door is available at Lowes, and is called the Ashbury.  A traditional shaker with an extra beading around the center of the mitered frame can lend itself to a faux inset.  

The Kraftmaid Sonora (available from Home Depot), as well as private dealers, is similar to the  Thomasville Saxony, with a simple molding along the top and bottom rail of the frame.  

This doorstyle from Timberlake Cabinetry shows the same molding application in the interior rails as some of the previous door styles I have shown in this post.  

Friday, August 12

Tubs

Tired of the same old builder grade tub you've had in nearly every house you've lived in?  That same tub you've seen in apartments?  It's the basic tub, but it's not the only tub.  Even if that is the size you need,
there are a lot of other options out there, that most people didn't even know about.  

The Good Old Fashioned Soaker, a typically deeper tub that allows the user to submerge into water.  These tubs offer a great relaxing experience, and are typically less expensive than many jetted and massaging options.

Duravit Daro Series Soaking Tub in Acrylic 
The true traditional soaker, the American Standard Reminiscence claw foot tub, starting at $2000

The whirlpool tub, often called a Jacuzzi, is a popular option that creates a spa like atmosphere in any bathroom.  Made by many of the leading tub manufacturers, these tubs are great therapy, and come in many shapes and sizes as well as installation options.  These tubs use whirlpool jets to cycle water through the tub.  The jets are adjustable, so the jets can be directed to hurting areas such as lower backs, shoulders, etc.  Be sure to get an in line water heater to maintain the temperature, because with out it, the bath may not last as long, as the water does get cold fast.  While these tubs do require a little more maintenance than other models, the maintenance is minimal and very simple.

The Sia by Jacuzzi starts at about $5000

Bubble massagers, another tub that creates a spa like atmosphere and experience, are typically lower maintenance than whirlpool options, and also less expensive.  These tubs use tiny pin holes to deliver air through the water creating a carbonation like massage.

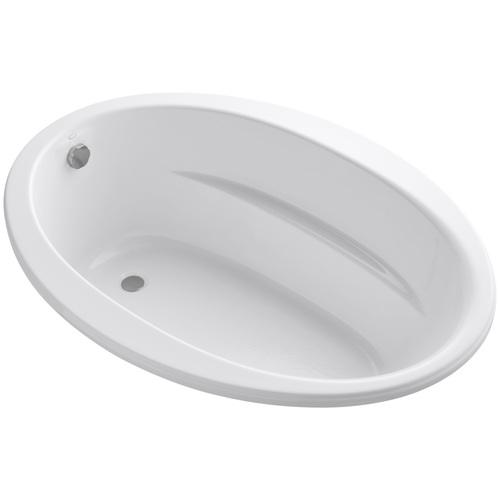
The Kohler Sunward starting at $2000
The third option for massaging experiences in the bath tub, is a new technology from Kohler, the VibrAcoustic tubs, including the Fountainhead tub.  The first tub to offer the technology uses sound waves to produce the massaging effect.  The Fountainhead tub is the first and only tub available with this technology, and was introduced at the 2011 Kitchen and Bath Industry Show.  There are going to be more options available with this technology by next year, including options that fit into the same spot as the standard tub opening.

The Fountainhead VibrAcoustic tub by Kohler starting at around  starting at around $8,500.

The last style of tub that is sweeping the market is the walk in tubs available from many vendors.  This quick draining tub features a door so you can walk in an out, with out having to step over a high side.  These tubs are great for users with limited mobility.  Available as standard soaking tubs or equipped with whirlpool jets, these are a great addition into any home designed for aging in place.

Walk in tubs by Safety Tubs

Thursday, August 4

The Two Toned Kitchen

These days, it is becoming popular to have multiple cabinet finishes and door styles in the kitchen.  The perimeter one color, and the island another.  Mixing and matching countertops and styles.  It allows you to throw in a fun vibrant color, making a bold statement, and giving your new kitchen that extra little flair and personality you always wanted.

This Kraftmaid kitchen features a white finish on the perimeter cabinets, with a multi-level wood toned island.  This kitchen features the same door style to tie the two elements together.    

This traditional style kitchen designed by Ken Kelly features an off white perimeter kitchen cabinet color with a teal island.  The similar door style and countertop tie the two elements together.  

Kitchen by Jackie Glisson 

From HGTV