Showing posts with label DIY. Show all posts

Monday, March 14

Color Picks for Spring 2016

Here are my picks for Spring 2016.  Soft and muted hues are sure to brighten your space.  They can be used in any combination, and come from the Sherwin Williams "Vintage Chic" collection paint colors.  This collection includes: 
  • Sea Salt, SW6204, a soft green 
  • Alabaster, SW7008, an off white
  • Ponder, SW7079, from the purple family
  • Ancient Marble, another green
The rest of the collection is an great spring inspired pallet that coordinates well together in part or in full.


SW6204 Sea Salt
SW7008 Alabaster
SW7079 Ponder
SW6162 Ancient Marble

Monday, March 7

5 Spring Decor Idea's


Spring is coming,  and it is time to start dusting off the glue gun and get your spring decor on. Here is a collection of some of my favorite spring interiors with links to products and D-I-Y's for obtaining the same looks in your own home. One of the things I love most about Spring, is how easy it is to decorate for.  

ComfyDwelling.com
I am in love with these soft blue vases with pink tulips. Tulips are a spring essential, and I love how they look.  They add color, and brighten up a space.  Tulips are also available in a wide variety of colors, so you have quite a few options to coordinate with your space.  Yellow, white, pink, even orange, purple, or red.  You can mix and match colors or go with all the same colors.  

Now to create this look.  I found similar vases here, here,  and here. You can purchase tulips at your local grocery store.  I don't recommend buying flowers online, but if you must, you can find them here.  This is a quick and simple arrangement that can be done on a mantle, hearth, entry table, or anywhere else in the house.  This is a low skill project that doesn't require any special equipment (like that glue gun!)  Just a few simple notes: I typically like doing these arrangements in odd numbers, three or five vases, etc. Also, you don't have to fill all the vases with flowers. Note how this arrangement has two of the four vases filled with flowers.

ComfyDweling.com
This next image, much like the first one, is easy and obtainable in many areas of your home.  From the mantle to the entry table, even the front porch.  This vignette features a few items: 

This vignette is easy to make look great. Notice again, there are three vases, (I love them in odd numbers!).  Two one one side, and one on the other.  The bunny helps even out the vignette with the centered greenery in a tin planter, the chalk board, and the antique window. 

Dreamy Whites
This lovely table setting is perfect for Spring. The white ceramics are beautiful, and the lilac's are even better. Here are some of the items you will need to duplicate this space:
This table setting is very easy to duplicate. I have always believed that when you don't force a table setting, it looks natural. Less can definitely be more, and don't try to force it.  If you notice this setting, there is room to breathe.  There isn't so much on the table that you can still actually see the table.  Fill those mason jars with lemon aid, and your ready for a Sunday Spring Brunch.  Add some macaroons or petite fours, and your golden!


FrugalHomeMaker.com
Now for the DIY's. 

One spring item that I love, is this amazing DIY tulip wreath that is not only easy to put together, but inexpensive, and will brighten up and liven up your front door.  Some of the item's you will need for this tutorial are: 

Follow along with the tutorial, and you will have a great wreathe to grace the front door and welcome your guests.  (Including the Easter Bunny!)  If you don't want to use only tulips, then shop around Michael's or Hobby Lobby and find a spring assortment that will make you happy. Hydrangeas, lilac's, lilies, any spring bloom will look great. 

This next DIY is fabulous. It includes Mason Jars.  How can you go wrong with Mason Jars? Painted Mason Jars are a big trend right now.  Forth this DIY, you will need the following: 
Now, be sure to follow along the tutorial.  This tutorial has you paint the interior of the mason jar, but you can also paint the exterior and sand some areas for a more shabby chic distressed look. If you go that route, I would recommend Chalk Paint


Happy Spring and Happy Decorating!

Monday, October 19

6 Gorgeous Fall Porches

The air is getting cooler, and the pumpkin spice latte's are plentiful.  So what does that mean for your house? Whether you are decorating for Halloween, or fall in general, here are some absolutely gorgeous porches to get you inspired.


Simple with a splasg of color.
By Seaside Interiors

Lovely vignette,simple and clean.
By ComfyDwelling.com

Another chic vignette
By ComfyDwelling.com

Simply Elegant 

Lovely seating area
By ComfyDwelling.com

Eclectic Fall Decor
by EASYdesigns

Wednesday, October 14

Buying Guide: Kitchen Sink's


Since writing my Electronic Faucet Buying Guide, I have been asked to follow up with a Kitchen Sink Buying Guide to go along with it.  There are many kitchen sink option available in today's market.  Not only with size and design, but also materials of kitchen sinks.

I personally believe that the Faucet and Kitchen Sink are the two hardest working products in your entire home.  They need to be treated, and selected, as such.  Don't get a $99 sink/faucet set from Home Depot and then get mad when it's broken less than a year later.

When selecting a sink, your style of cooking and cleaning really need to be evaluated by you and your house hold.  Here are some things to consider:


  • Who does the dishes?  Don't get a sink too deep to cause back discomfort. Try them out.  
  • What's your dish washing style? Dishwashers use 1/6th the amount of water, and should be doing most if not all the washing.  Your dishwashing style will determine the number and configuration of bowls.
  • Is it for looks, or is it for function?  If you are an empty nester who eat out 5 times a week, your sink needs will be different than a family who always eats at home and has a house full of kids. 
  • What finishes are you looking for? Color, something that blends in with the counter?  The color you want will help determine the material.  
So, these are just a few questions to ask yourself.  When thinking about a kitchen sink, BE HONEST WITH YOURSELF. You are just doing yourself an injustice if you can't be honest about your needs and wants. Also, your needs need to come before your wants.  I shouldn't have to state this, but if your need is for something as indestructible as possible, but you want stainless to match your appliances, ditch the stainless, you will be disappointed. 

Now for the materials. I will say, I am a little biased and opinionated on the matter, but after selling sinks for 11 years, and hearing the complaints, my opinions are more about experience than anything.  
Franke Peak PKX11028 

Stainless Steel. Yes, they look good, but I hate them. I absolutely hate them.  To get a good stainless steel sink you should expect to pay around $750 and up. If you decide to go this route there are a few things you need to know.
  • They Scratch. No matter how much you spend, is going to scratch.  (Unless your my mom!) 
  • Get grids. If the sink doesn't include protective grids, buy them. They are generally $100 per grid. They will help protect the bottom of the sink. 
  • Gauge. First of all, gauge is the actual thickness of the steel, and the smaller the number the thicker the steel. I recommend getting a 16 or 18 gauge sink. 
  • How is it made? In addition to the gauge, this is the most important thing.  There are stamped sinks, where they take a giant sheet of steel and press them into the shape of the sink.  Think about that Salt Water Taffy. What happens when you stretch it?  It get's thinner. Some sinks are folded and soldered. These are the ones you want.  
  • The next is the noise.  Sound deadening pads and under coating will make the sink quieter when the disposal is on, and when the water is on. 
Rohl Shaws Original Casement Edge Sink

Fireclay. Fireclay sinks are popular with the apron front style sinks.  These super durable sinks are great. Beautiful, as well as durable.  They are just as durable as a Cast Iron sink, yet feature thinner walls, often allowing for a larger basin.  Like Stainless, you get what you pay for. Because of the nature of this material, every sink is different. Don't ever cut a cabinet or countertop based on a template. Only use the actual sink. 1/8th of an inch can ruin your kitchen!  Here are some questions:
  • Is it hand made or machine made?  Generally the price will tell you. If it's under $1000 assume its made by a machine. If it's hand made, it will be more costly.
  • Hand made typically have more of a chance of size variations. Meaning it could be up to 1/4"smaller or larger than the display. 
  • Ask about pooling, and do your research.  Some fireclay sinks have unlevel bottom's, which can result in liquids pooling in the bottom of the sink. Some people, myself included, could careless, but if this will bug you, make sure there aren't a lot of complaints online and through the showroom. 

Blanco Diamond Super Single
Composite Granite. These are my own personal favorite. These sinks are a true work horse.  Scratch resistant, stain resistant, heat resistant, the whole deal. There are great shapes and designs available, and quite a few colors.  Most people opt for colors that blend in with their countertop, but contrasting the counter surface creates a great look as well. Like all sinks, you do get what you pay for. There are many brands of Composite Granite sinks, but in my opinion, Blanco's Silgranite is the one who has mastered the technology. 
  • First,when purchasing a composite granite (or any kitchen sink), be sure to inspect the sink for any cracks chips or damage before you even schedule your counter template. 
  • If you get a light color, I suggest getting a grid to protect the bottom of the sink.  Some pans, specifically cast iron, can transfer black marks.  They will come out, but why scrub if you don't have to. 
  • Some of the darker colors can also show water spots. If you have dark colors and hard water, simply dry out the sink after each use to avoid spots. It takes 2 seconds, it's easy, and good practice for any sink. 

Cast Iron. The traditional work horse. These sinks have been around for 50 years, and when taken care of, still look brand new.  Kohler is the major manufacturer of Cast Iron sinks.  There are many colors and shapes available. These sinks are cast iron, covered in an enamel.  They can chip, but the amount of force it takes to chip the enamel would ruin any sink on the market.  I typically warn people to be careful of the center divide if they get a double bowl. 
  • Like Composite Granite, if you get a lighter colored sink, get a grid to protect the bottom of the sink.  
  • Do Not Ever clean the sink with an abrasive cleaner like Ajax or Comet. It can scratch the glaze and you will never be able to keep the sink clean. (In fact, if you own some of these cleaners, throw them out for good!) 
  • Also, dark colors can get ruined by hard water, so be sure to wipe them dry when your done. 

So these are some of the major competitors for kitchen sinks.  Hopefully this gives you some criteria for a future sink and some ideas on what to look for when selecting your next sink.  Like a faucet, you get what you pay for, and you really need to invest in the best possible sink you can afford, which ever style you prefer.  


Wednesday, September 16

Buying Guide: Electronic Faucets


You see the commercials, you see the magazine advertisements. The questions are always the same, do electronic faucets live up to the hype, or are they just something to break? This buying guide will help you know what to look for and what to ask when shopping for your next kitchen faucet.  This will help you also identify the pros and cons of the different technologies available.  

What are electronic faucets?
Some people call them "Touchless" however that isn't the right term. Here is what you need to know. There are a few types if Electronic Kitchen Faucets on the market. Those that require touch, and those that are motion activated, or truly touchless.  It's important to identify the touch style faucets and the motion faucets, and identify which one will work best for you and your family.  Most consumers actually get the touch activated faucets over the motion faucets, but we will get more in detail on that later.

Brizo Artesso Smart Touch Faucet in Polished Nickel
Questions to Ask:  When you get to the showroom, here are a few questions you may want to ask the showroom sales person.  
  1. What's the warranty on the specific faucet you are looking at?  Are there any other brands with a different warranty or longer warranty?  
  2. What's the power source? If batteries, how long do they last, or is there an option to upgrade to a plug-in style?  
  3. What is the quality of the brand? Are they lower end, mid level, or high end.  I always suggest looking at different styles with many price points.  The Faucet is the hardest working "Appliance" in your kitchen.  It's worth the extra investment.  
  4. Does the showroom have samples hooked up you can use and test?  I don't recommend buying a motion or touch faucet without "playing" first.  

Delta Touch2O/Brizo SmartTouch Technology
Delta and Brizo have my favorite of the electronic kitchen faucets. They require touch, and for my lifestyle, that just works better. The big difference between the two is ultimately the aesthetics behind the design. Because Delta and Brizo are sister companies, the interior guts are essentially the same. They feature the same cartridges, same electronic mechanism, same hoses, etc.

The wonderful thing about these faucets, is you can touch them (almost) anywhere to turn them on. The neck, body, and handle work as your on/off touch area. They will turn on and be at the same temperature the faucet was the last time you had it on. These faucets also remember which spray pattern you used last.  The key is to actually leave the faucet handle in the on position.  This is great, because if the handle is in the off position, you can touch as much as you want and nothing will happen.  This works great for those of us with cat's at home.  No worry that the cat is going to turn the faucet on while scratching her nose.

These Technologies work great because of its ease of use. Like the "hands" commercial shows, your hands can be ants messy as ever, and all you have touch do is tap the faucet. Tap with your fingers, knuckles, wrists, forearm, elbow, chin, whatever floats your boat.

I personally have used the Brizo Talo and Artesso models, and love this technology. The main difference between Delta and Brizo are limited. Aside from the jump in price, they designs themselves are much more favorable in Brizo. Both feature a 5 year warranty on electronics, and a lifetime warranty on the finish. Both are battery operated, however some of the new Brizo faucets will feature an outlet where aren't electric outlet can be added. These faucets run on 6 AA batteries, and the battery pack is on a long lead which can be mounted toward the front of the cabinet, and need to be replaced about every 6 months. While Delta is typically a "Low-Medium" end faucet, Brizo is more high end and definitely worth the extra investment. As I said, their designs are flawless, and after all, the quality is definitely in the details.  Some of the cons include one big one, the faucet doesn't work when the batteries are dead. At least there is a low battery indicator!


Moen MotionSense Faucets
Moen features two sensors for their motion activated faucets. One is on the front of the body of the faucet, the other is at the top of the neck. This allows for dual operation. The top sensor a lows you to wave the faucet on, then wave it off when done. The lower sensor works similarly to other motion faucets where the faucet will turn on, then turn off as soon as you move away. The lower sensor is perfect for filling a glass, washing hands, and other simple tasks. The top sensor is great for dishes, and more heavy duty tasks.

My biggest concern with motion faucets is simple. I have never been good at operating these types of faucets. I often joke with clients that I am a pale ghost and they just don't see me. I can 0ut ,y hand I'm front and wave away, and nothing happens. The Men faucet that I have actually used, the Arbor, has worked well with my pale hamds, so bonus points for Moen.

Client complaints I have been told include "The Ghost Faucet" where people complain the faucet will sense you walking by and turn itself off and on. Kind of creepy!


Pfister React
Pfister is typically a lower price point option. There is currently few designs available, however the features will speak for themselves.  As I said with Moen, I am not typically fond of Motion faucets because of my transparent skin not working well with them. That being said, I haven't actually used the Pfister model, so I don't know if it see's me or not.

This model features one sensor. This sensor is much smaller than the Moen models, which in my opinion is more favorable, as aesthetics are important.  Some of the features include: 2 minute automatic shut off, easy temperature adjustment, hibernate mode, and a low battery indicator.  The two minute shut off is great, and a feature most consumers ask for. If the faucet is turned off, it will automatically shut itself off, conserving water in a hectic kitchen. Like other motion sensor models, the temperature will always be the same, a preset temperature, which on the Pfizer models, cam easily be adjusted for your lifestyle. Hibernation mode is perfect for cleaning the faucet, or when you go on vacation, preventing the cat from turning the faucet on.


Kohler Sensate
This technology features a sensor under the neck of the faucet. I love this! It's discreet and great for aesthetics. This faucet is designed to let you wave not only your hand, but objects as well, to activate the faucet.

Now, I haven't actually seen this faucet, so I can't say much about it.  But knowing Kohler's track record for quality and a competitive price, I am sure this faucet will wow it's users, and is well worth the investment.  

Like what you see? Be sure to LIKE Steel Lily Design on Facebook and get even more!


Monday, June 29

Understanding Cabinet Pricing

I want to start this post out by saying that I wish the cabinet industry would stop the insanity. They all post this starting at price for a 10×10 kitchen, and all consumers see is the price. First of all, no one actually has a 10×10 kitchen (and if you do I apologize), and second of all, no one actually buys that "Starting At" kitchen.

Lets get the basics and the common sense out of the way. When they say a 10×10 kitchen is "Starting at $6,495" they are saying the same thing as Ford saying a Focus starts at $6,495". Yes, you can buy at that price but guess what, no automatic door locks, no A/C, manual windows (whats that?), no power steering, you get the picture right? Who wants that car? Manual windows?  Do kids these days even know how to operate a manual window?

So lets get back to cabinets. First and foremost,  that 10×10 price, ignore it, forget it even exists. Even if your kitchen is 10×10, you still need to ignore it. It is even less realistic than that Ford Focus we were talking about. I like you focus on the actual linear footage. This is the price per foot of a specific door style from any specific manufacturer.

Lets say we are going to have a 12×15 kitchen with a 6' island, cabinets on both sides. This is 39 linear feet of cabinets.  (Double the size of that 10×10 kitchen, but falls in the more realistic average of 175-200 s.f. kitchen). From my experience, I am going to say the low to medium end door at Home Depot and Lowes is somewhere around $200/linear foot. So 39 x 200 = $7800. That's not too bad right? Again, this is that stripped down Ford Focus we were talking about. You want to add a that Greige paint you fell in love with? Add 12-15% ($1,170) and you definitely want All Plywood Construction, add another 12-15%, now your at over $10,000 and we haven't even begun to add moldings, glass doors, roll out trays, a waste basket or two, and those super huge pot and pan drawers you have been dreaming about. My general rule of thumb, is to DOUBLE or even TRIPLE that linear foot pricing.

That's right, to get most of the common upgrades your going to want to double, so $15,600 is a more realistic price to that same $6,495 kitchen.  If you want to go all out, with upgrades, accessories, and finishes, you should triple the figure. It all depends. There is no way to say "How much does a kitchen cost?" Everyone's wish list and taste is different, even if they have the exact same kitchen layout. I have never designed the same kitchen twice. Well, I have had two neighbors with the exact same floor plan pick out the exact same cabinet and the price was still several thousand different. Why? The wishlist and what each one wanted was different.  I designed two kitchens for a builder for the same floor plan, still went two totally different directions on style and the price was equally drastically different. 

So like I said. There is no answer to the age old question, "How much does a kitchen cost" question. But there is a good way to you to take matters into your own hands, and estimate.  A way for you to look at different cabinet companies and get a better feel at if you can afford to upgrade. Stop looking at the 10×10 number however, and start looking at the linear footage pricing instead. You will be less likely to set yourself up for extreme sticker shock later, and save the time of your kitchen designer and cabinet maker.  

Monday, September 29

5 Temporary Kitchen Essentials for your Remodel


I have said it more than once.  Most people only experience a full blown kitchen remodel once in their lifetime, and have no idea what to expect.  So when you start setting up your temporary kitchen, what do you do?  What do you need to keep out?  What can you live without, and what is an absolute must.  Where would you even begin?  Here are some basics, because after all, eating out at McDonald's every night is going to get expensive!
  1. Microwave - Today's microwaves can be a great all in one cooking device, especially convection styles that can bake any casserole your family could want.  Some even come with a steam setting which can steam veggies in just a few minutes.  (I use this feature on mine weekly!)  So your temporary kitchen should include a microwave.  If you are concerned about the microwaves and your families safety, then look into a toaster oven.  If you have an over the range model, do not use it in your temporary kitchen.  They often pull too much energy, and have a slanted bottom, causing them to be dangerous, and to trip a breaker.  If the only microwave you have is an over the range type, take a trip to target or Home Depot and get a cheap counter top microwave.  A good sized unit will cost you around $100, and you may even be able to donate it after the remodel.
  2. Toaster Oven - Not your regular toaster.  Toaster ovens can act like a mini oven, making small casserole's, baking chicken or whatever you need your oven to do.  They are small and usually inexpensive.  A great alternative for the microwave-free family.  (I got my toaster oven at CVS for less than $20, so seriously, not a huge investment!)
  3. Coffee Maker - Ok, so everyone enjoys a good cup of "wake up juice" but you can also use the coffee maker to generate hot water for anything.  Even getting a head start on boiling potato's or macaroni and cheese for the kids.
  4. Camp Stove - If you don't have a bar-b-q, then a camp stove is a great investment.  Fry up some yummy taco's.  You can also use it with that hot water from the coffee maker when making that mac n cheese, or mashed potato's. I got my camp stove at Home Depot for under $80, and it uses those little mini propane tanks.  We got through two summers on one mini tank, so it shouldn't cost you too much to keep it going.  
  5. Keep it Simple - Keep clear bins labeled with cookware and utensils, spices and pantry essentials.  It will help make your life easier when looking for that one wooden spoon you kept handy, or the spices. It is also a highly frustrating time for any family to live through, so the simpler you keep it, the better for everyone involved. 
Obviously a Refrigerator is a must, so hang on to that old fridge and keep it out of the way of work.  You can use it to keep the cereal milk nice and cold.  I have also had clients tell me they keep the kitchen project schedule handy, so they can "count down the days" until they get to cook for the first time.  A light at the end of the tunnel if you will.  I also recommend not tearing out the old kitchen until the new cabinets have been delivered and are ready to go in.  Avoid any extra delays.  If a cabinet comes in damaged, why spend that extra few weeks without a kitchen?  

Wednesday, September 24

Fall Tablescapes and How to Create Them


Thanksgiving is just around the corner, so what could possibly be a better post, than setting that amazing feast table?

So, let me tell you a little about me, and my family when it comes to holiday feasts, we are the poster child for lazy meals.  We load up the island and treat it like a big buffet, if you want to eat, get off your butt and grab a plate.  There is nothing on the table, because the more you put there the more you gotta clean up.  You will only find the things that are required, a glass for your one beverage of choice, napkin, and a fork.  I wouldn't know the proper way to set a table if it killed me.  So when I got married, I was surprised to see that there are actually people who know how to set the table.  Can look at a place setting and know exactly which bread roll is theirs, and which wine glass is theirs.  This concept is completely foreign to me.  So this is one reason I wanted to write this post, help the sisters (like me) out there throw an amazing holiday feast, with a properly set table that looks amazing.

Lets start out by the place settings themselves.  What goes where?  I learned an awesome trick at a wedding once.  If you make that "OK" symbol with your hands, link the index and thumb, your Left hand makes a "B" and Right hand makes a "D", bread and drink!
I found this diagram which is an excellent display of what goes where. When dining, you will use your utensils from the outside in. It is somewhat obvious since your salad fork is on the outside, followed by dinner, then dessert.  There isn't much more I can talk about here, the picture pretty much explains it all. 

Now that we have that figured out, lets go over some amazing fall tablescapes to get you inspired for your holiday entertaining. Now if you don't already follow my Harvest Season Board on Pinterest, you should. I have some amazing ideas for tablescapes from fun and festive to formal and ornate.  There truly is something

Contemporary Table  by
Focal Point Styling
This tablescape features one very necessary element to any tablescape or vignette you can create, and that is layers.  If you notice, they used a square charger, large plate, napkin, small plate and then the pumpkin.  Creating layers is a great way to also show different textures.  Just like in this display, the plaid plate, golden pumpkin, and then the rattan textured charger.  They all blend well with the table runner and leaf detail on the candlesticks.

When creating your perfect fall table, start layering right there in the store.  Play with the plates, linens, and decorative pieces to create a look all your own. Play with shapes, textures, and like this design, even various prints.  "Matchy Matchy" has it's place, and so does eclectic and fun, shown here.
Also, when trying to recreate this look, Home Goods is my favorite place to shop.  They have great prices and selection.

White Pumpkin Table Scape by
Ann West Interiors
Want to play it safe, or still not sure what to do with textures and patterns?  Try something like this tablescape by Ann West Interiors.  She created a table scape by simply placing white pumpkins of various sizes and shapes down the center of the table.  The use of white candles of various heights creates even more stunning interest.  The hurricanes with candles and leaves create height.

When looking for pumpkins, consider foam craft pumpkins, that can be used year after year.  Fake not your thing, often you can find them in bulk at places like grocery stores, home improvement stores, or of course, your local pumpkin patch.

Glittering Table by
HGTV
This amber tablescape by HGTV features similar colored glass ornaments including stemware and accent pieces, candles, and foliage.  A lovely table setting that is both classic and timeless.  This scape can also be done year after year, and tweaks in foliage, can also be used for Christmas.
A tablescape like this can be easily created using pieces from Pier One, or even Crate and Barrel.  Be careful with the amber colored dishes and shopping multiple stores.  Some might be more yellow, and some more orange.  You want it to match!

When creating your look, shop around.  This can get expensive.  Especially if you need to create many place settings.  This is one reason why I love places like Home Goods, Marshall's, and Ross.  They often have some great pieces and very affordable.  The biggest challenge at these stores will be finding the quantity you need, again if you have a lot of place settings.
Enjoy, and again, follow my Harvest Season board on Pinterest for even more How-To's and inspirational photos. 

Friday, June 27

3 New Cabinet Color Trends in 2014


So last week I wrote about the fun trends we are seeing in kitchen's, especially inside the cabinets.  How about the cabinets themselves?  What colors are popular right now?  We all know Honey Oak kitchen cabinets are out.  What about white paint, is that still in?  Espresso?  Is that still happening?  Let's take a look at what colors are doing well in today's kitchen remodel.

Off White Cabinets

Yes, it's true, the stark white is not the most popular color anymore.  It has been replaced by one of two options, Off White and Grey.  People are saying that white too crisp.  It's too bright.  They want to tone it down a little bit.  So they are going with three tones.  Yes, soft cream and canvas type colors, and taupe are popular for a warmer toned kitchen.  These off white cabinets help warm up the space, and create a "Not so Stark"or "hospital' kitchen.  Glaze free, they are also are easier to keep looking clean and amazing.  (That's right, glazes are on their way out the door, and I couldn't be happier about that!)

When looking for these tones of cabinets, the options are absolutely gorgeous.  Cabinet manufacturers are coming out with some great colors that blend well with stained cabinets, making it easy to do a two toned kitchen, or pair with wood flooring or other furnishings.  

Kitchen by Home and Stone
Grey
Grey cabinets are the same story.  People don't want the stark white "hospital look" anymore.  Grey is blowing up in popularity, and many of the cabinet manufacturers are scrambling to come out with the newest top selling shade.  I have seen these cool tones blowing up in the wall color market as well.

Grey cabinets can lend themselves to a cooler toned room, shying away from the heavy Tuscan influence I see in my area, which makes me love it even more.  If your looking to paint your existing colors, a worry free color pallet is available by Jeff Lewis Color.  

Blue Accents in Cabinetry
Blue, or a greyish blue mix is another major trend blowing up.  Again, manufacturers are scrambling to come out with these colors.  They look crisp and fresh, and bring new life to any space.  I fear that like in the 90's, people are going to be sick of blue again, so be cautious.  If you want to do it anyway, check out Jeff Lewis Color, because again, his blue's are what this trend is all about.

If your fearful about doing blue, and locking yourself into a color, forever, then just stick with grey.  You can add blue with accents, and take them out when your tired of it.

Kitchen by In Detail Interiors
Bonus Color Trend
So what about all those folks not wanting to paint their cabinets, and still love the look of stained cabinets and the grain?  There is still a big draw for the dark espresso cabinets, however it will still hide some of the grain.  Going dark is still the trend I see my clients asking for, when it's not white or off white.  The photo to the left shows what I have been seeing in the past few months.

I honestly wish I had my own photo's to show you, but many of my designs are still in the process of being installed.  Keep an eye out in the Portfolio for updated photos of these trends and my own designs.


Tuesday, June 24

Three Kitchen Remodel Regrets to Know & Avoid

Most people are completely happy with their kitchen remodel, however sometimes they do have a few regrets.  What are those regrets? It comes down to the basics: Budget, Finishes, and the Pro's.

1: I didn't spend enough money.  
Wait what? You would probably expect this to be the other way around. The truth is, 36% of re-modelers wish they had spent a little more on those things they cut due to budget.  This may frighten you, considering in 2012 the National Kitchen and Bath Association (NKBA) reported the average kitchen remodel is about $47,000, or 10% the value of the home.

So what would they spend more on? Interior accessories and finishes is a big one. Things like Roll Out Trays and added organization features. Upgraded appliances is also a big one, and professionals to get the job done. Many people are overly confident in their abilities and admit they should have hired contractors to do the work for them. 

Now, don't get me wrong, there are plenty of people who regretted spending too much. So what would they cut second time around? One common answer is unnecessary appliances like beverage coolers, trash contractors, and warming drawers. Most of the people who regret spending extra on these items state they would have loved the extra storage space instead of an appliance they rarely use or really need. Many people are regretting the use of a trash compactor versus a waste and recycling cabinet that takes the same amount of space.

2: The Finishes
There are a lot of options when it comes to finishes in the kitchen.  some budget changing options can include going with a semi custom cabinet line versus custom, especially with the wide variety of options and modifications now available.  Many of my clients who have opted for this money saving option have managed to get some of their upgrades for free, like extra roll out trays, all plywood construction, and upgraded finishes like paint.

Other finishes include glazes on cabinets. A trend I personally see on its way out, many clients complain they make the cabinets look dirty. Consider a highlight if you must have the look. A glaze is applied to the whole door then wiped off, leaving residue and some color on the whole door. A highlight is the same glaze, only applied to the detail of the door for a much cleaner look. 

Other finishes include flooring, countertops, lighting, faucets, and hardware. When shopping for these finishes, price shop, compare, and shop around. Cabinet pulls often can cost you $10+ at specialty shops. Often online you can find the exact same knobs and pulls for less than $5. Companies like Liberty sell their knobs and pulls for cabinet manufactures who then sell to cabinet shops with double or triple markup. If you go to Home Depot you can buy the exact knob without the markup from the cabinet manufacturer, saving you a few bucks.

When it comes to the other finishes, still shop around. This is your kitchen, and its a one time thing. Get the best quality for the price, and have a few backups! Look at big box retailers, mom and pop shops, and everything in between. Trust me, you wont hurt anyone's feelings if you do, in fact, they already expect you are shopping around.

3: The Pro's
Hiring a pro is like hiring an employee. In fact, they are your employee. Remember, they work for you, and you are a team. Have interviews with multiple pros. If you are working on a full kitchen remodel, you need to consult a real Kitchen and Bath designer.  Not an Interior Decorator, not an Architect, but a Kitchen Designer. We all know my feelings on certification. There are thousands of amazing designers out there that aren't certified.  (Its an expensive test that takes away time from work and families to study and prep for. So don't discredit a  designer for not having fancy letters!) Interview them, get to know them, because they will make your life easier over the next few months. Think you cant afford one? Most big box stores like Home Depot, Lowe's, and Menards offer the service free. Granted sometimes the designers aren't the best trained, so look for experience,  longevity, and professional training like college. Shy away from a designer that has only been the department for a few months.

Another pro is a Contractor. Many home owners think they can do it all themselves, when in reality it isn't as easy as replacing a faucet. Again, get bids and interview contractors. It might be less expensive than you think, and one of those extra expenses many people regretted not investing in.

There is a great commercial out today? With a Doctor mowing a lawn, and a landscaper performing surgery. Professionals do this type of work daily and will make your life easier and more enjoyable.  Sometimes the extra investment is worth it's weight in reduced stress and a more enjoyable experience.  

Wednesday, September 25

First Home Remodel Realities

Congratulations,  you just bought your first home. It's not new, but it is definitely new to you. No more crummy apartments, or worse, your mom's spare room! This place is yours, all yours. Every last bit, the outdated kitchen and light fixtures, down to the stained carpet and scuffed up walls.  So you now have a remodel project and a depleted budget. What do you do?
Unlike my previous posts on kitchen remodel phases, remodeling a house in phases is totally different. Especially if you just moved in to someone else's filth. (I know, I did it in March of 2012 while six months pregnant!). So what do you do and when?
I still stand by my top down mentality, however, I am going to throw a giant wrench into your plan. After all, remodeling a house is a science, especially when your on a budget.  When your living in the house, and putting up with the mess day in and day out, the "science" has some pretty big variables to keep in mind.  And especially when the house has been poorly maintained and quite possibly a hazard to your health.  How can a house be a hazard?  Simple, lead paint, asbestos, or even remains of pet waste that has soaked through the flooring.  That can be a hazard to your health or your families!
What are your top priorities? 
No really, I am being serious! Don't tell me the outdated but fully functional kitchen is your top priority.  It works, yes the cabinets are golden oak and the appliances are a rainbow of available colors.....but it all works perfectly fine, and gets the job done. When I talk about priorities, I am talking about things like that urine soaked carpet covering the entire residence,  the holes in the doors, the broken ceiling fans, asbestos in the linoleum, these priorities. The ones that for health and your sanity, should be fixed right away.  You wouldn't want to spend your remaining budget on a kitchen full of stainless steel appliances, when the flooring is saturated in cigarette smoke, and the single pane windows are letting all your air conditioned air out!
When I got the keys to my house, the entire floor was covered in carpet that was soaked into the slab with dog urine.  Not to mention the chain smoker who lived there prior to us, leaving a film of residue over every wall and the ceilings.  So while yes my 1986 oak kitchen with three colors worth of appliances bug me, the floor is a health thing. Remember, I was pregnant.  We spent the majority of our fix up budget on getting the house healthy for myself, and the new member of our family. 
It is all about priorities and budget. While typically yes, you want to work from the ceiling down, you need to prioritize health and must fix asap issues, before you fix cosmetic ones.
How long are you going to stay in this house
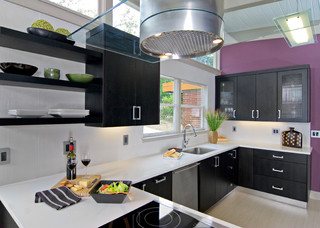
Again, I know your a single gal living in a 2 bedroom 1 bath condo. You can't honestly believe you are going to be there until your 60 right? Our house is a 3 bed 2 bath duplex. I have one kid already and know at least one more will be coming in a few years. The schools around here SUCK! I don't see myself living here ten years from now. So think about it, honestly! Why spend $30-40,000 on your dream kitchen when your not even going yo be there to enjoy it? Take a page out of my book. I painted my cabinets. My 1986 honey oak cabinets are now a dark shade of almost black brown. New hinges and hardware, looks like a brand new kitchen. I am sticking with the awful tile and array of mis-matched appliances until they die! Why not right? Rustolium makes a great kit, Cabinet Transformations. $300 and you have a brand new kitchen sistah!
Again, be honest with yourself. That's the best way to truly be happy with your new investment.  When fixing up that fixer upper, it is best to take your heart strings out of the equations, and think about your upgrades and updates as a business investment, since after all, it is an investment.  If done wrong, or poorly, you could end up wasting your money!
Here is what I spent my money on!
We spent about $10,000 fixing up our home, trying to get it livable.  Here is what we did:
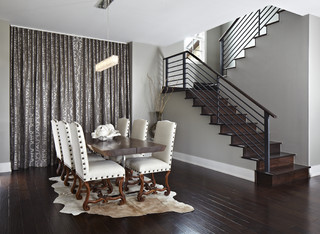
  1. Flooring through out. We got laminate flooring through the majority of the house, and carpet in the three bedrooms.  The tile in the two bathrooms worked out well, so that is the only flooring we kept.  We had Home Depot install the flooring for us. They had a killer deal, if you get more than 200 square feet of "Special Order" laminate flooring, they will install for $397, plus the whole house of carpet for $99. I picked a color of laminate that looked good with the honey oak, but will also look good once I painted them.  (I already knew the color I wanted to go with, thus working from the top down!)  We also got new baseboards, since the oak 1x2's didn't look pretty!  I also slapped a fresh coat of paint on the fireplace, and painted the mantle to match the fireplace.
  2. Paint and Primer.  I am not a smoker.  If you smoke, that's your business, but I do not want to come home to an ash tray after a long day at work, no offense!  So we ended up priming and painting the entire house, ceilings, trim and all! 
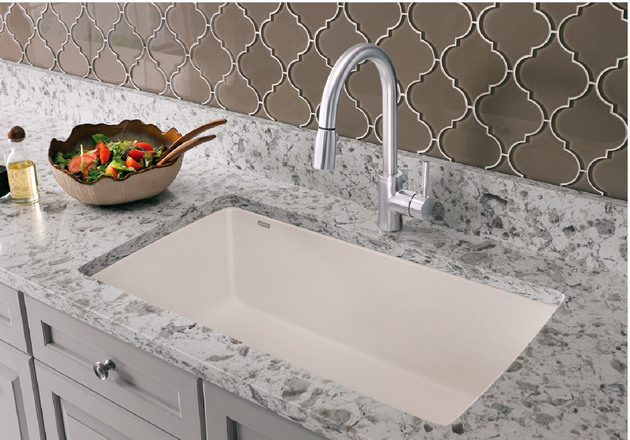
  3. Painted the kitchen cabinets.
  4. New lighting fixtures through out the whole house.  The 1986 fixtures were hideous and didn't put out much light at all! 
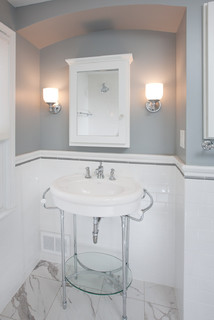
  5. Replace the toilets, as I said, this house was filthy!  I didn't want to touch those things!
  6. Install new shower heads in both bathrooms because there weren't any. 

The things still on our list:
  1. Replace lavatory faucets (These are piled up in the closet!) as well as install new towel bars.
  2. Paint the bathroom cabinets and laundry cabinets.
  3. Repaint all the bedroom doors and closet doors (those are piled up in my garage)
  4. Replace appliances.
  5. New counter tops throughout.  (I am working on my husband on this one!)
I hope this helps!  As I have said before, it's very important to get help if you don't know where to start.  A realtor can help you with this, as well as a designer.  You are investing your money, invest it like it's a business, and that is the best way to make your money back.  We sure have, in just 18 months! 

Monday, July 29

Don't be Afraid of Bold Colors!

Ok, so my last post was about crisp grey colors that are exploding in popularity.  So this one, I am going to completely contradict myself and go in the opposite direction.  I am going with another collection of colors in the Sherwin Williams 2014 Color Forecast, Intrinsic! Bright colors that can be used as wall colors, or even accent or accessory colors.
Sherwin Williams SW 6841 Dynamo
Sherwin Williams SW 6788 Capri
Sherwin Williams SW 6382 Ceremonial Gold

Now, I bet your thinking, "Oh my, those are bright colors!"  Well, they look great.  Even together they add fun flair to any space.  The scene to the left shows a living room with all three colors on the walls and ceiling.

Now, don't get me wrong, I am not advocating going out and painting this room....unless you really do love it, but I think that bright colors can add to a space.  Don't be afraid of color!  To the left, you can see the same room painted with only one of the colors, and a more neutral lighter color on the walls.  That bright pop of "Dynamo" on the center wall creates personality in the space.  (And just in case your wondering, the new wall color is Sherwin Williams SW 6156 Ramie)

Now, if you are renting, you could easily paint one wall and enjoy the space, and just paint it back before you leave.  I know the accent wall has been a bit overdone, however it is still a super easy way to add to any space.

Ceramic Stool $290
You don't have to use these colors just in your space, I am sure you have seen them raiding the racks at your local clothing store.  There are also a large selection of brightly colored accessories, lighting fixtures, mirrors, and other materials you can accessorize your space with.
Felt Flower Pillow $15

Color isn't the enemy!  There are books, shows, and a ton of resources available to give you inspiration and ideas for using color in your decor.  Like this great article on using color in an open floor plan.  Or this article by Paul Anatier on when to use warm or cool hues.

So what are you waiting for, welcome color into your space!


Friday, July 26

Some New Trends in Color

Contemporary Dining Room by
Tracy Miller/Miller Greene Design Studio
I keep seeing a new trend in wall colors.  This color isn't so much a color, but a lack of color.  As much as I love brightly colored spaces, I love these cool crisp walls.  They add a certain element of luxury and sophistication.  They look even better with crisp white moldings, and as the above picture shows, dark rich woods.  The space pictured above is painted in Sherwin Williams SW 0077 Classic French Grey, which is part of the 2014 color forecast "Reasoned."

Traditional Bathroom by
Castle Building & Remodeling
With even just a slight tint of color, these soft grey's are refreshing.  Just like the bathroom pictured here.  Another one of the 2014 color forecast colors, Sherwin Williams SW 7660 Earl Grey is an amazing color.  One I considered painting my own home.  (I got veto'd, my husband wanted a warmer taupe).  

This bathroom takes two of the forecast colors, a crisp clean white and Earl Grey, and pairs them beautifully.  With a Calcatta Oro marble floor, this bathroom truly is breathtakingly beautiful.  This space, like the above space, would also look great with a darker floor.  This color would also be great in a kitchen with darker wood cabinets and a Cararra Marble counter top.  

Looking for more inspiration?  Check out the "50 Shades of Grey" article on Houzz.com, or view more pictures below!